Holiday Routing
This section provides a guide to configuring Holiday Conditions for your PBX system. This feature allows you to set specific dates on which the office will follow a different set of rules, such as using a holiday IVR.


Configuring Holiday Conditions
Access the Holiday Conditions Page
- Navigate to
Holiday > Holiday Condition
- Navigate to
Holiday Condition State
- The current state of the condition (e.g., Office Open or Closed) is displayed at the top of the page.
Name and Dial Code
- Name: Enter a unique name for the Holiday Condition.
- Allocated Dial Code: A dial code (e.g., *915) is automatically assigned. This code can be used to manually toggle the holiday mode on or off by dialling it from any phone.
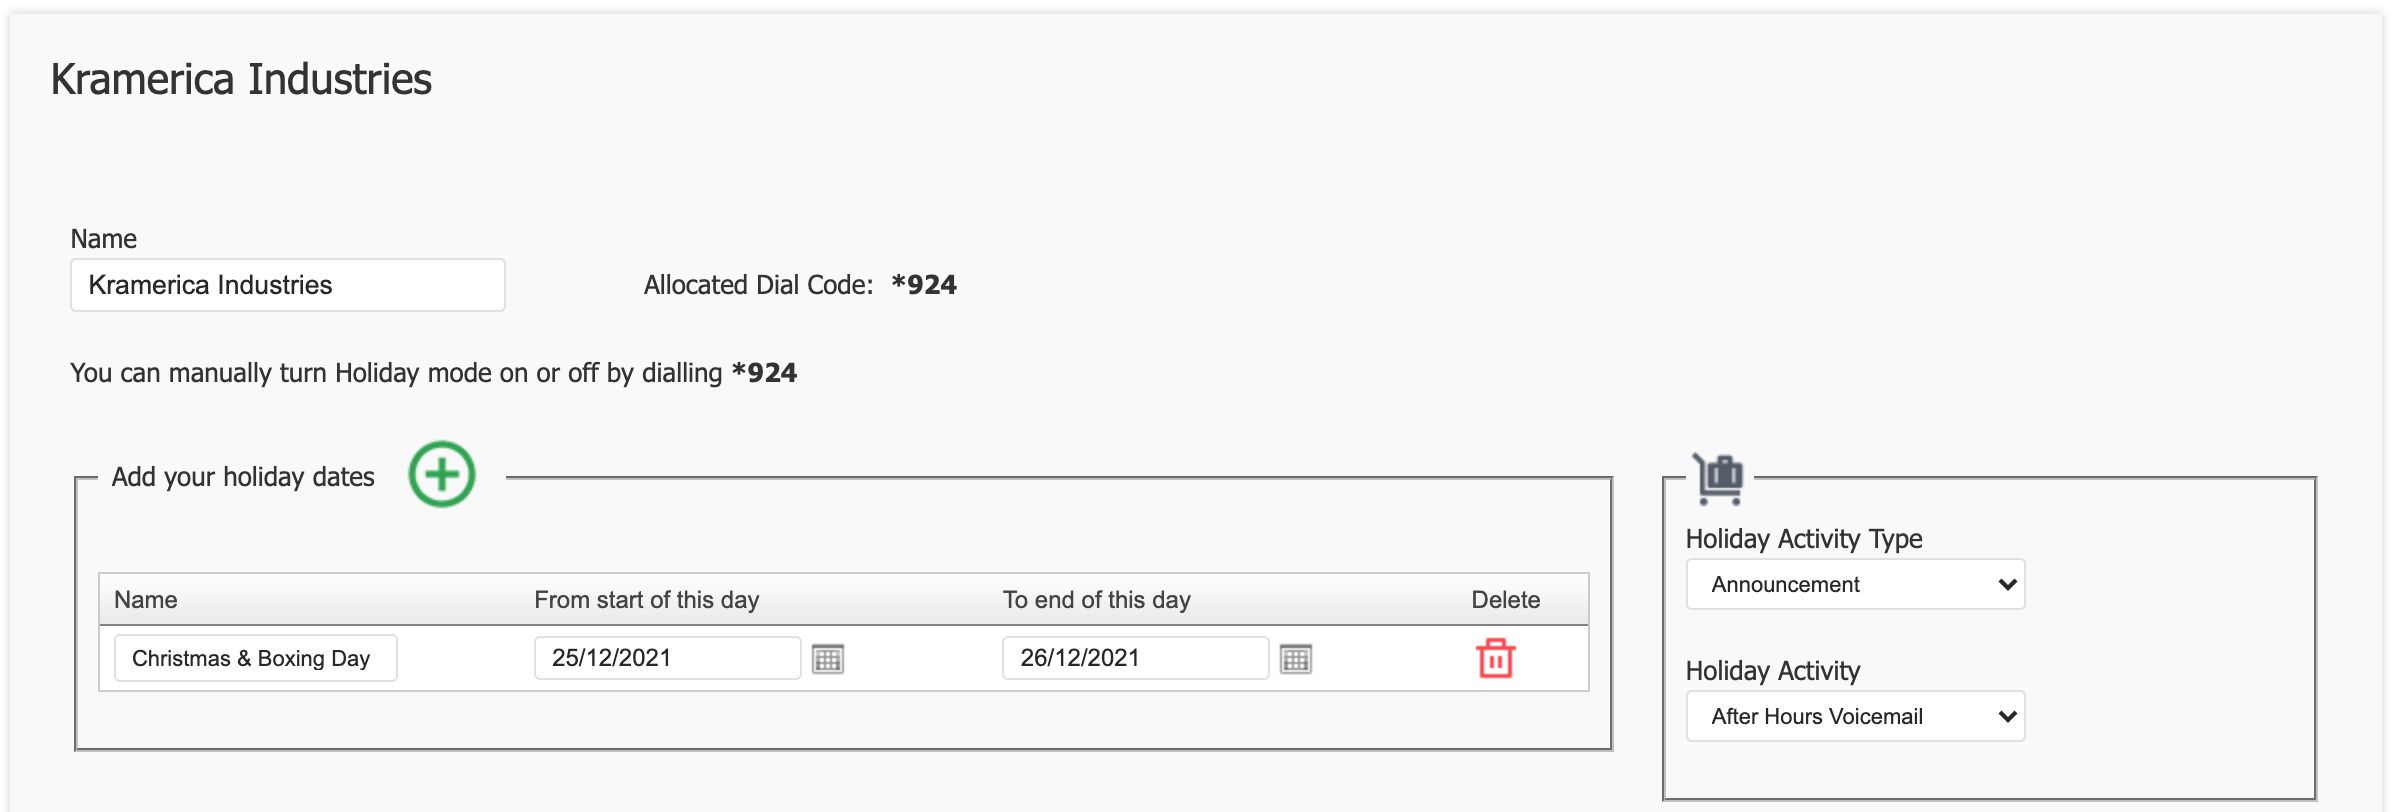
Add Holiday Dates
- Click the green plus (+) button to add new holiday dates.
- Name: Enter the name of the holiday.
- From start of this day: Select the start date of the holiday.
- To end of this day: Select the end date of the holiday.
- Delete: Use the red trash can icon to delete a holiday entry.
Holiday Activity Configuration
- Holiday Activity Type: Choose the type of activity to be triggered during the holiday (e.g., IVR).
- Holiday Activity: Select the specific holiday activity from the dropdown list (e.g., a pre-configured IVR).
Save or Cancel
- Save: Click the
Savebutton to apply the holiday settings. - Cancel: Click the
Cancelbutton to discard changes.
- Save: Click the
Enable Holiday Condition
- Assign the holiday condition to an inbound route by selecting 'Return to Service' to go back to the PBX homepage and select 'Call Routing'.

Locate the number you wish to apply the Holiday Condition to, and click 'View/Edit'.
Select the Holiday Condition you wish to apply to the call route.
'Save'.

- 'Apply Changes'.
Related Articles
Call Routing
Overview Call Routing allows you to define how incoming and outgoing calls are handled within your PBX system. This includes setting up call flows, assigning phone numbers, and configuring routing rules. Configuration Add Call Route: Navigate to Call ...Announcements
Overview Announcements are used to play a recorded message as part of a call flow. They are commonly used in scenarios such as informing callers of office hours, special announcements, or directing them to specific departments. Configuration Create ...Microsoft Teams Connector
Description The Microsoft Teams Connector allows you to integrate myCloudPBX with Microsoft Teams using Direct Routing. This enables Teams users to place and receive external phone calls via the same infrastructure used by traditional myCloudPBX ...Getting Started - Setup Steps
Overview MyCloudPBX is a cloud-based phone system designed for Australian businesses of all sizes, providing a flexible and feature-rich communication solution. This platform integrates advanced telephony capabilities with user-friendly interfaces, ...Lost Calls Report
Overview The 'Lost Calls' Report provides reporting on Incoming calls received by the phone system that were not answered by a user, with options to tailor the report with phone number, time period, and voicemail toggling filters. Note: Calls that go ...