Microsoft Dynamics
The myCloudPBX Dynamics CRM Integration enhances customer relationship management by integrating your call activities directly with your existing Dynamics CRM.
It features call journaling (with optional automatic contact creation) and automated CRM Smart Open where the callers contact page is loaded on your computer.
The integration’s CRM Smart Open functionality opens the appropriate Dynamics page based on the caller’s information:
- Contact Page: Opens if the caller ID matches an existing contact.
- Search Page: Opens when the caller ID matches multiple contacts, or if the caller ID is private or unknown.
This integration streamlines workflows, ensuring all interactions are efficiently managed and recorded.
Tip
Note: This guide assumes that you already have a working version of the CRM configured.
Dynamics Configuration
Before you can configure the Dynamics integration within myCloudPBX, you must first configure your Dynamics account.
Step 1.
Sign in to your Dynamics account.
Step 2.
Go to the Microsoft Azure App Registrations page.
eg: 'Azure Services' > 'App Registrations'.
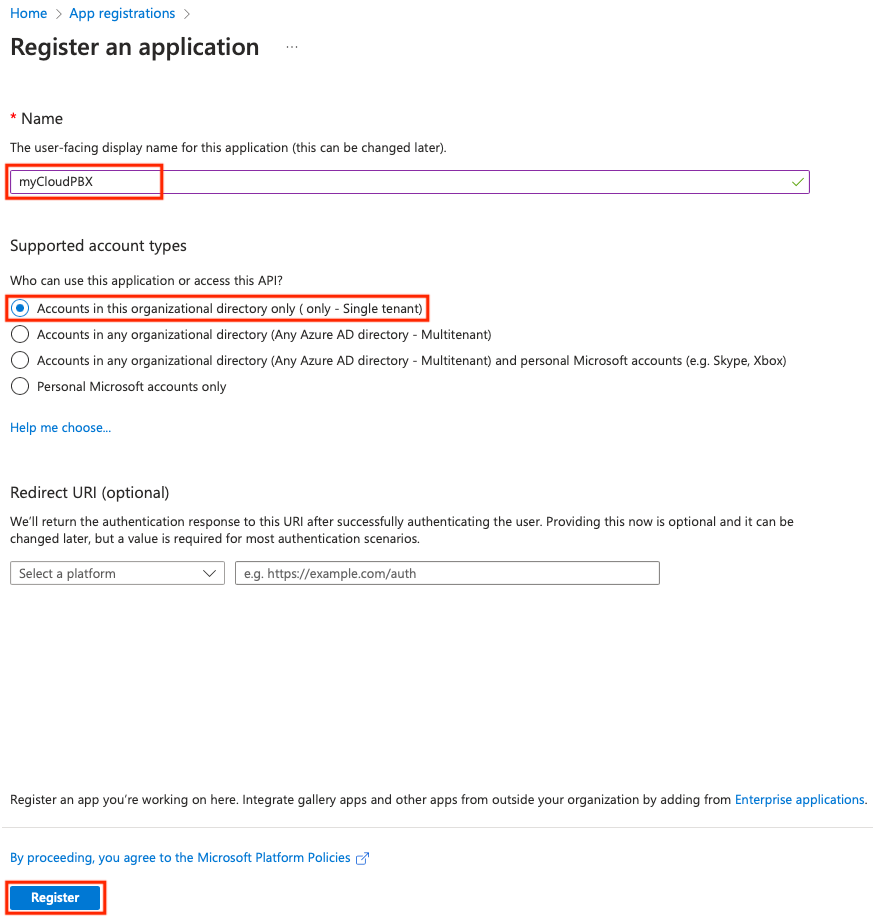
Step 3.
Enter 'myCloudPBX' when prompted for the 'Name'.
Set the Supported account types to 'Accounts in this organizational direcotry only (only - Single tenant)'.
Click 'Register' when finished.
Step 4.
In the app 'Overview' page, note the values of these fields for later.
- Application (client) ID
- Directory (tenant) ID
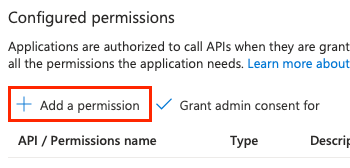
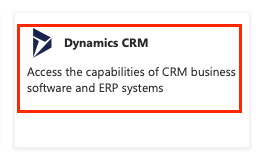
Step 5.
To add the required permissions, click on 'API permissions', then 'Add a permission', follwed by 'Dynamics CRM'.

Step 6.
Enable the 'user_impersonation' permission, then click on 'Add permissions'.
Allow up to 10 minutes for the changes to complete.
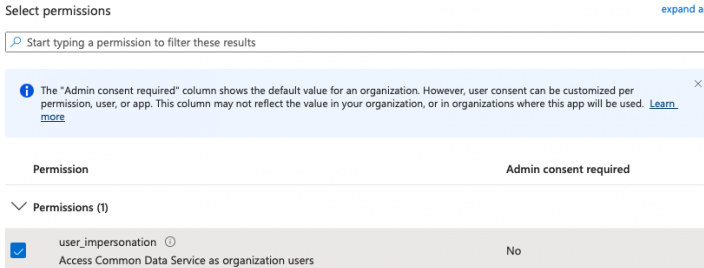
Finally, select 'Grant admin consent' and follow the prompts.
Step 7.
From the 'Certificates & Secrets' page, in the Client Secrets section, then select 'New Client Secret'.
- Set the Description to 'myCloudPBX'.
- Set the Expiry to your preferred option. Note that you will need to renew the configuration when the time is up..
- When you press the 'Add' button, you will have the option to copy the 'Client Secret'.
Warning
Make sure you copy the Client Secret to a secure location as Microsoft will not allow you to view this a second time..
Step 8.
Configure User / Security Roles.
Go to the Microsoft Power Platform.
Create an application user following these steps..
Note
When prompted to select an app, chose the app created previously (myCloudPBX).
Step 9.
Head to the App Users Screen and Edit Security Roles.
Select 'environments', then click on the relevant environment.
Click 'See All' to view all Apps.
Click the 3 dots next to the myCloudPBX app to edit.
Choose the appropriate roles based on your needs.
- Service Reader, direct.
- Service Writer, direct.
Call Journaling and Contact Creation
With the Call Journaling with Contact Creation feature enabled, myCloudPBX will automatically log calls within Dynamics for you.
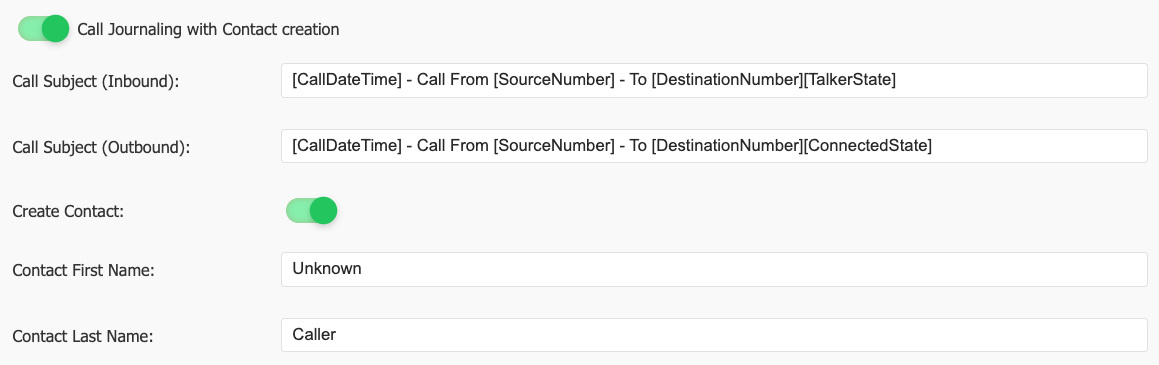
Enter in your preferred call subject for Inbound and Outbound calls, noting that you can use the following variables to generate the subject line.
Possible Variables:
- CallDateTime: This value represents the Date and Time of the call.
- SourceNumber: For an inbound call, this will show the callers full caller ID (eg: 0731051300). For an outbound call, this will show the internal extension number of the user who made the call (eg: 324).
- DestinationNumber: This represents the full national number that was dialled.
- TalkerState: For inbound calls only.
- ConnectedState: For outbound calls only. Note that for outbound calls we cannot confirm if anyone spoke on the call, only that the call was connected to a remote system.
Tip
Note: You will need to ensure that each variable is enclosed in square brackets as shown in the image above.
The Create Contact is an optional setting that allows myCloudPBX to automatically create a new contact if the caller ID is not found in your CRM. Enter the preferred first and last name to use for the new contact.

Once you are happy with your configuration, click 'Save', and make sure to Apply PBX Changes if prompted.
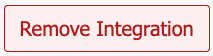
Remove CRM integration
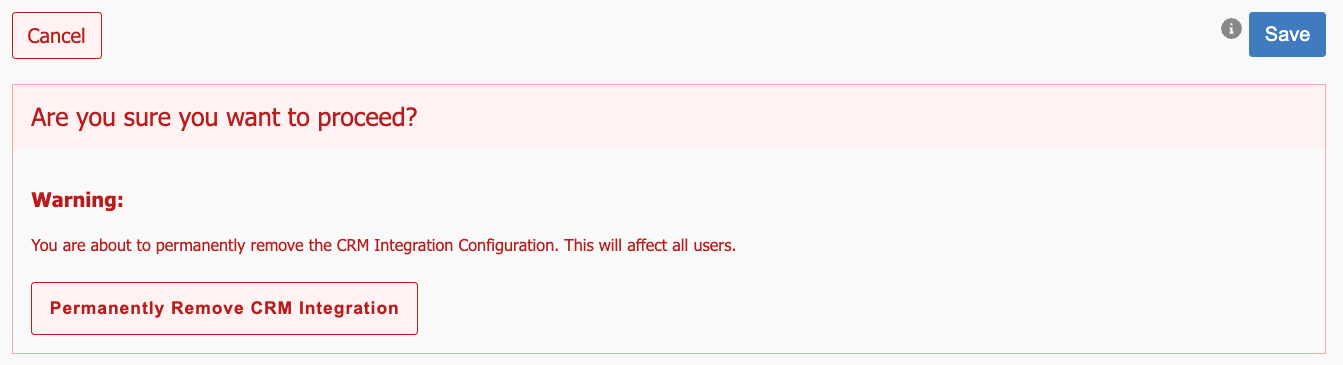
Warning
Note: This action cannot be undone.
You can permenantly disable the CRM integration by clicking the Remove Integration button.
You will then be prompted again to confirm the removal of the integration.
Click 'Permanently Remove CRM Integration'.
Related Articles
Microsoft Teams Connector
Description The Microsoft Teams Connector allows you to integrate myCloudPBX with Microsoft Teams using Direct Routing. This enables Teams users to place and receive external phone calls via the same infrastructure used by traditional myCloudPBX ...Set Up Your Microsoft 365 Email
Get Your Microsoft 365 Mailbox Ready Accessing your Microsoft 365 email on your computer, phone, or tablet allows you to stay connected wherever you work. Once configured, your mailbox will sync across supported devices, giving you access to email, ...Migrate Email Accounts to Microsoft 365
Moving your email accounts to Microsoft 365 provides access to modern collaboration tools, improved reliability, and centralized management. With the right preparation, you can migrate mailbox data with minimal disruption while maintaining access to ...Set Up a Shared Calendar in Microsoft 365
A shared calendar in Microsoft 365 makes it easier for teams to coordinate schedules, manage appointments, and keep everyone informed about upcoming events. Whether you're supporting a department, reception desk, or project team, a shared calendar ...How to Add a Shared Mailbox in Microsoft 365 Using Outlook for Mac
Shared mailboxes allow multiple people to manage customer enquiries, team communications, and shared business email from a single inbox. After you've been granted access, you can add the shared mailbox to Outlook for Mac and start using it alongside ...