Manual Provisioning
Overview
Manual provisioning allows you to configure your desk phones manually if auto provisioning is not available.
Cisco SPA Series
Access the Web Interface:
- Enter the phone's IP address into your web browser.
- Log in as an admin and navigate to the advanced settings.
SIP Tab Configuration:
- Set the RTP packet size to 0.020.
Regional Tab Configuration:
- Set the local timezone and daylight saving rules.
Phone Tab Configuration:
- Enter the station name, display name, and voicemail number.
- Set the handset input gain to 6.
User Tab Configuration:
- Configure the date format to day/month.
Extension Tab (EXT 1) Configuration:
- Set the proxy address to the PBX IP address and register expire to 60.
- Enter the subscriber information including display name, password, and user ID.
System Tab Configuration:
- Configure the IP details for the local network.
Grandstream HT802
Logging into the HT802's Management Portal
- Plug an analog phone into the FX1 Port.
- Dial *** (triple star).
- Select option 02 at the prompt.
The device's IP Address will be now read back to you.
Enter the IP Address into your web browser.
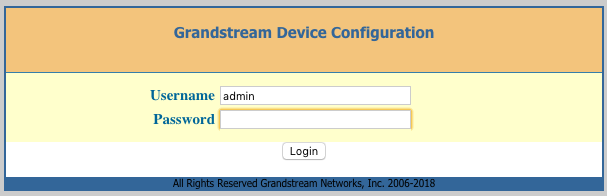
If this is a new HT802, Grandstream sets the default credentials to:
- Username: admin
- Password: admin
Click 'Login‘.
Security Settings
Reset Admin, User, and Viewer Passwords
Click on the 'Basic‘ tab.

It is strongly recommended that you reset the above passwords immediately.
Click on the 'Admin‘ tab.

It is strongly recommended that you reset the above password immediately.
Note
Not resetting the above passwords can lead to toll fraud and very high bills.
Disable HTTP Access
Click on the 'Basic' tab.
- Set 'Web Access Mode‘ to HTTPS only.
- Set 'Disable SSH' to 'Yes'.
Network Settings
Click on the 'Basic‘ tab.
You can configure your needed network settings on this page.
Click 'Apply‘ when finished.
You will need to reboot the device for your changes to apply correctly.
SIP Configuration
Click on the 'FXS PORT1’ tab.
- Set ‘Account Active’ to 'Yes‘.
- Set 'Primary SIP Server’ to the PBX domain (e.g., pinetree.mycloudpbx.com.au).
- Set 'SIP Transport‘ to 'TCP’.
- Set 'NAT Traversal‘ to 'Keep-Alive’.
- Set 'SIP User ID‘ to the ’Extension Number’.
- Set 'Authenticate ID‘ to the 'Extension Number’.
- Set 'Authenticate Password‘ to the 'Extension Password’.
- Set 'Register Expiration‘ to '1’ (minutes).
- Set 'Reregister before Expiration‘ to '15’ (seconds).
- Set 'Enable SIP OPTIONS Keep Alive‘ to 'YES’.
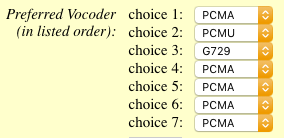
- Set the 'Preferred Vocoder' order as follows.
Factory Resetting the Device
- Plug in and power on the ATA.
- Locate the indented 'RESET' button between the power and ethernet port on the rear of the device.
- Use a paper clip to press and hold the reset button for 10 seconds. Do not release the button until all 4 lights on the top of the ATA flash for 1-2 seconds.
Tip
The ATA may reboot several times before the factory reset is completed.
Usage
- Use manual provisioning if auto provisioning is not available or for advanced custom configurations.
- Ensure all settings are correctly entered to avoid any issues with phone registration and functionality.
Best Practices
- Regularly update phone firmware to ensure compatibility with the PBX system.
Related Articles
Offboarding Process for Office 365 Users
Purpose This process ensures all departing users are offboarded from Office 365 in a consistent, secure, and compliant manner. All Swazzy staff must follow this procedure to protect company data and maintain smooth access for ongoing operations. ? ...Hardware
Known Compatible Hardware The following hardware has been tested and is known to work with the myCloudPBX Auto Provisioning server. Yealink Hardware Yealink T19 Yealink T20P Yealink T22P Yealink T23G Yealink T23P Yealink T27G Yealink T28P Yealink ...How to Enable Secure Boot on Windows and Mac
Secure Boot helps protect your computer by allowing only trusted software to run during startup. Enabling this feature helps reduce the risk of boot-level malware and unauthorized operating systems. Follow the steps below to enable Secure Boot on ...Set Up a Static IP Address on Your Device
A static IP address keeps the same network address assigned to your device, making it easier to support services such as remote access, port forwarding, network printers, and shared devices. Setting it up correctly helps maintain reliable ...How to Set Up Backup Alerts and Notifications
Backup alerts and notifications help you monitor backup activity and respond quickly when a backup fails, is skipped, or requires attention. Setting up notifications ensures you're informed about important backup events so you can address issues ...